-black.png)
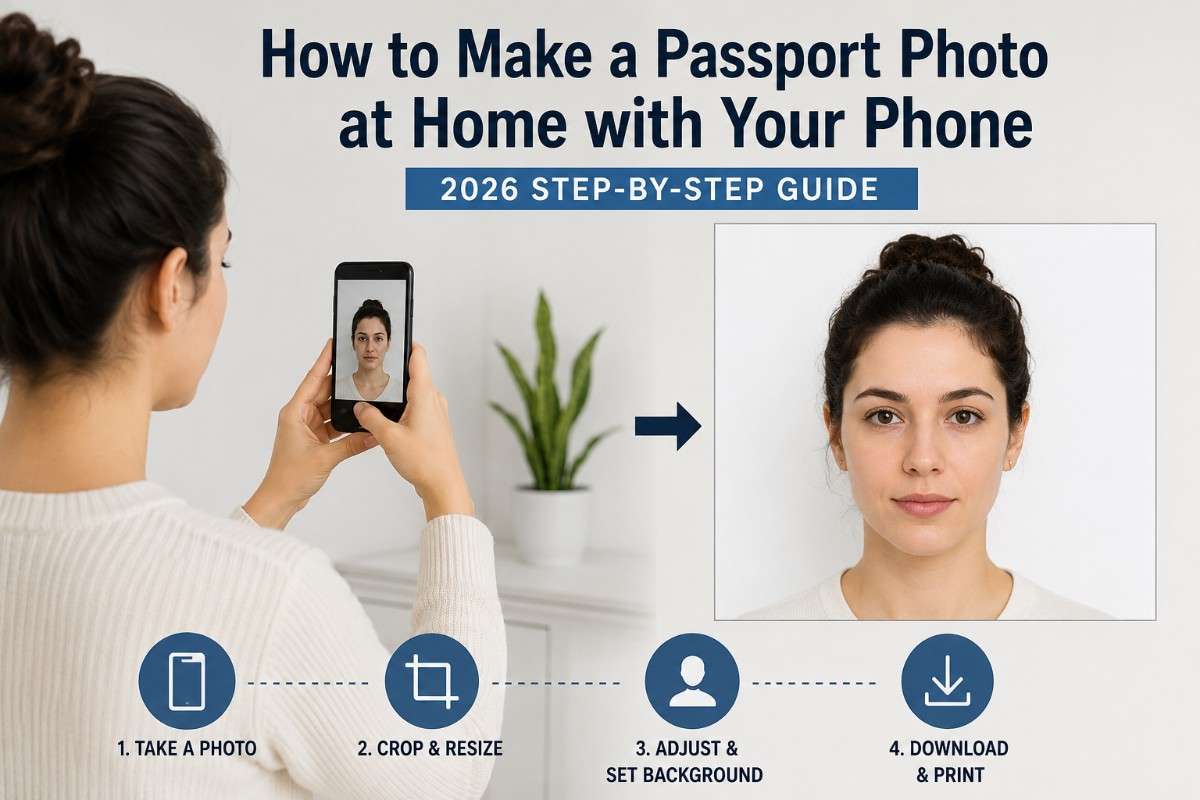
You can make a passport photo at home in minutes. Take a phone selfie against a plain, well-lit wall, then use a free online tool to crop it to your country's size, set the background, and fix the framing. No studio, no appointment — most people finish in under five minutes and pay nothing for the digital file.
What you need before you start
The equipment is simple: a smartphone from roughly the last five years, a plain light-colored wall, and a window or bright room. Everything else — cropping, background, exact sizing — is handled after the shot. Before you shoot, it helps to know what almost every country asks for.
|
Requirement |
What most countries want |
|
Expression |
Neutral, eyes open, mouth closed |
|
Background |
Plain white or light grey, no shadows |
|
Head position |
Centered, facing forward, 70–80% of frame height |
|
Lighting |
Even light, no harsh shadows or glare |
|
Accessories |
No hats or sunglasses; glasses only if allowed |
|
Resolution |
Sharp, in focus, at least 600×600 px |
How do you take a passport photo with your phone?
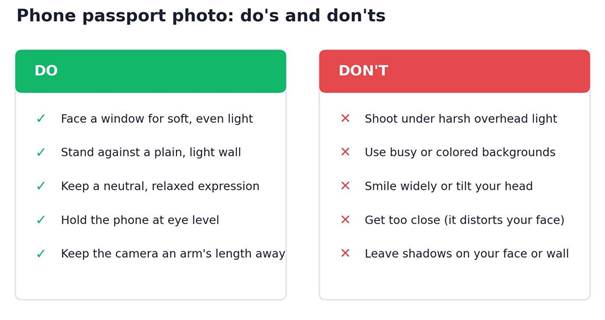
Getting the raw shot right saves you re-takes later. Follow these five steps and you will have a photo an AI tool can clean up perfectly.
- Find soft, even light. Face a window during daytime so light falls evenly on your face. Avoid overhead lamps, which cast shadows under the eyes and nose.
- Set a plain background. Stand about half a meter in front of a plain white or light wall so there are no shadows behind you. A door or blank wall works well.
- Position the phone at eye level. Prop it up or have someone hold it at arm's length, level with your eyes, so your face is not tilted up or down.
- Keep a neutral expression. Look straight into the lens, relax your face, keep your mouth closed and both eyes open. Remove hats and tinted glasses.
- Take several shots. Snap five or six frames so you have options. Pick the sharpest, most evenly lit one to upload.
How do you turn a phone selfie into a compliant passport photo?
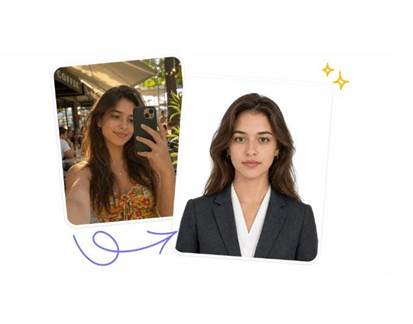
A raw selfie is never the right size or background for a document, so the last step is an AI editor that reformats it to spec. In your browser, a good tool resizes the shot, replaces the background, and centers your head automatically in one pass.
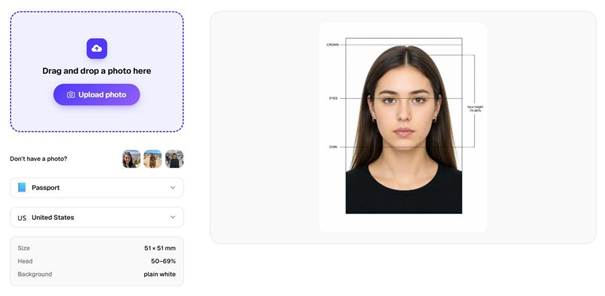
Using one of these tools takes about half a minute:
6. Open the tool in your browser and upload the selfie you picked.
7. Choose your document and country so the size is exact — for example 2×2 in for the US or 35×45 mm for the EU.
8. Pick a background color, usually plain white, and generate.
9. Download the high-resolution file, then upload it to your online application or print it.
A good option is Overchat AI. Its passport photo online maker runs on the SeedDream 5.0 image model, adds no watermark, and returns an HD photo in about 30 seconds. It can also remove your glasses, adjust your expression to neutral or a light smile, and even swap a casual top for a formal blazer if your selfie was too relaxed.
What are the size and background rules by country?
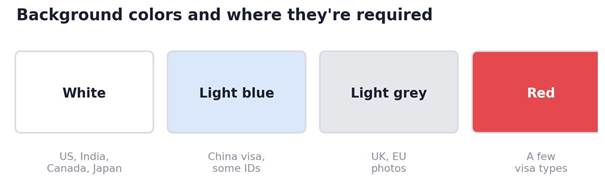
Sizes and background colors differ by country, so match your document before you generate. Then confirm the finished file against the official government page, since specs are updated from time to time.
|
Country / Document |
Size |
Background |
Head height |
|
United States — Passport & visa |
2×2 in (51×51 mm) |
White |
25–35 mm |
|
United Kingdom — Passport |
35×45 mm |
Light grey / cream |
29–34 mm |
|
Schengen — Visa & EU passport |
35×45 mm |
White / light grey |
32–36 mm |
|
Canada — Passport |
50×70 mm |
Plain white |
31–36 mm |
|
India — Passport, OCI |
35×35 mm |
White |
25–35 mm |
|
China — Visa |
33×48 mm |
White / light blue |
28–33 mm |
|
Japan — Passport |
35×45 mm |
White / off-white |
32–36 mm |
How much does it cost, and can you print at home?
The digital file is free with most AI tools, versus $15 to $20 for a studio or pharmacy sitting. If you need physical prints, export a 4×6 inch sheet with several copies and print it at a pharmacy kiosk — Walgreens, CVS, Walmart, or FedEx — for roughly $0.40, then cut the photos to size. For an online application, you usually only need the digital file. Because the whole process runs on your phone or laptop, you can also redo it for free if a photo is rejected — something a paid booth will not do without charging you again.
Overchat does more than passport photos
If you reach for Overchat to fix a passport photo, it is worth knowing the passport maker is a small part of a much larger toolkit. Overchat AI is an all-in-one app with 150+ purpose-built tools for image, video, audio, and text, powered by the latest models from GPT, Claude, Gemini, Grok, Kimi, and Qwen. The same account that sized your visa photo can also write a cover letter, summarize a PDF, edit images, or draft a trip itinerary across several frontier models at once.
That range is the real reason people keep it. Instead of paying for ChatGPT, Claude, and Gemini as three separate subscriptions, you reach all of them through one interface for a lower combined cost. It works on web, iOS, and Android and is used by more than 350,000 people — many of whom, like you, first arrived for a single quick task.
What makes a passport photo get rejected?
Most rejections come from the photo, not the paperwork, and the causes are easy to avoid. The frequent ones are a shadow on the wall behind you, uneven light that darkens one side of the face, a slight smile or tilted head, glare on glasses, and a background that is off-white instead of plain. Hair across the eyes, or a head that fills too much or too little of the frame, also triggers returns. When a tool shows head-height guides, line your crown and chin up with them. If you are unsure which background to pick, choose plain white — it is accepted almost everywhere and gives the AI the cleanest base to rebuild from. Taking a few extra frames at the start gives you a backup to try if the first result does not pass.
Frequently asked questions
Can I take a passport photo myself at home?
Yes. Use a phone camera, a plain light wall, and soft window light, then reformat the shot with an online tool that sets the correct size and background. Governments judge the final photo against their rules, not where or how you took it.
What background do I need for a passport photo?
Most countries require a plain white or light grey background with no shadows. A few visas ask for light blue or red. AI tools replace whatever is behind you with the correct color, so a plain wall at home is enough to start.
Will a phone selfie be high enough quality?
Usually, yes. Any phone from the last few years takes a sharp enough photo. Shoot at arm's length rather than up close to avoid distortion, keep your face well lit, and pick the sharpest frame before uploading.
Are home-made AI passport photos accepted?
Yes, when they meet the official specification: correct size, plain background, neutral expression, and proper head height. Reputable tools do not change your facial features. Always review the final image against your country's guidelines before you submit it.